Featured Post Today
print this page
Latest Post
Showing posts with label internet-tips. Show all posts

Install Anvide Lock Folder to protect folders on computer


Anvide Lock Folder is a software which helps you protect folders containing important data to prevent unexpected users from accessing them. We will instruct you how to install Anvide Lock Folder to use on the computer in the most effective manner.

Anvide Lock Folder can be used for protecting all folders which contain documents and personal data so that no one, except for you, can view the contents of these folders when using the same computer.


What are the benefits of installing Anvide Lock Folder?
- Set protected password for folders regardless of folder sizes.
- Quickly use utilities with built-in hotkey combinations instead of mouse manipulations.
- Support commands for manipulations on MS DOS window.
System requirements
- Install Anvide Lock Folder on computers running Windows operating systems with all versions such as Windows XP, Windows Vista, Windows 7/8.
INSTRUCTIONS TO INSTALL ANVIDE LOCK FOLDER
Step 1: Open the folder containing Anvide Lock Folder’s setup file which is saved in ALF.exe format (or if your computer does not has this folder, you can download the latest version of Anvide Lock Folder here)
Step 2: Select an appropriate language for being used on the interface of Anvide Lock Folder later on. Each language is represented by the flag of a country, select a flag and click check sign for confirmation.
Step 3: You have to agree with terms required by the producer to continue installing Anvide Lock Folder. Click Accept to agree.
The utility is very compact, so the installation process will be very fast. After being installed successfully, Anvide Lock Folder will have an interface as below:
Thus, with several simple manipulations, you have finished installing Anvide Lock Folder.
1 comments

How to log in Facebook by Gmail

Have you ever heard of logging in Facebook by Gmail? This feature allows you to easily access Facebook by your Gmail accounts.
If you are using Facebook or Gmail, let’s add Facebook in Gmail. Thus, accessing to Facebook will be extremely simple by clicking Facebook in your Gmail account. Please follow this tutorial to learn how to do it.


Step 1: Log in Gmail.

Step 2: Click the gear icon in Gmail, select Settings
Select Labs.
Step 3: Find Add any gadget by URL and select Enable
Select Save changes
Step 4: After selecting Save changes, the system will automatically reload and return to the home page of Gmail. Thus, we need to Click on the gear icon in Gmail, select Settings
Select Gadgets
In this section, copy the following URL into Add a gadget by its URL:

http://hosting.gmodules.com/ig/gadgets/file/104971404861070329537/facebook.xml

choose Add
Step 5: Return to the main page of Gmail, and you will see Facebook icon beneath the chat box.
Finally, simply click and log in as usual. This utility allows you to update email and Facebook frequently without wasting time switching back and forth between tabs. Hopefully, these little tricks will be helpful for you.
1 comments

List of shortcuts in Facebook

Shortcuts can help you manipulate quickly without having to use the mouse. Facebook also provides a number of shortcuts to help you manipulate more quickly and efficiently.
Using combinations will make it easy for users to manipulate when using the software, program, ect. If in the previous articles, Betdownload.com introduced to you shortcuts in Word and Windows, ect, Today's articles will show you shortcuts in Facebook.


For Google Chrome

Alt + M: Open New Message

Alt +?: Open the search box.

Alt + 1: Go to Home page.

Alt + 2: Open Timeline

Alt + 3: Open Friends

Alt + 4: Open Messages / Messages

Alt + 5: Open Notifications

Alt + 6: Open General Account Settings

Alt + 7: Open Privacy Settings

Alt + 8: Open Facebook main page

Alt + 9: Open Legal Terms

Alt + 0: Open Help Center

For Firefox Browser

Ctrl + Alt + M: Open New Message

Ctrl + Alt +?: Open the search box.

Ctrl + Alt + 1: Go to Home page.

Ctrl + Alt + 2: Open Timeline

Ctrl + Alt + 3: Open the Friends

Ctrl + Alt + 4: Open Messages

Ctrl + Alt + 5: Open Notifications

Ctrl + Alt + 6: Open General Account Setting

Ctrl + Alt + 7: Open the Privacy Settings

Ctrl + Alt + 8: Open Facebook main page

Ctrl + Alt + 9: Open Legal Terms

Ctrl + Alt + 0: Open Help Center

When at News Feed

- Use "J" and "K" to move up and down on Facebook.

- When the cursor is a Status or images, press "L" to like or unlike, or press "C" to leave a comment.

These are shortcuts supported by Facebook. Let’s experience with these shortcuts to use Facebook quickly and effectively.
0 comments

Customize display of Toolbar in the interface in Word

Usually, when you open a Word page, you will see three standard toolbars in Word page, they are Standard Toolbar, Drawing Toolbar and Formatting Toolbar. With the following article, We will guide you how to customize the display of the toolbar in Word.
Every time you launch Word, you will see 3 standard toolbars in the interface. Each toolbar gives you great functions to edit the text.


- Standard Toolbar with the main functions such as New, Open, Save, Print, Copy, Paste, Undo, Redo, create tables, ect.
- Formatting Toolbar with the main function such as formatting the text including Font, Size, style, Align, Bullet and Numbering, ect.
- Drawing Toolbar to functions to draw objects in the text, Word Ard, insert images, ect.
Furthermore. in Word there are various toolbars with various features for editing text.

You can perform the following actions on the toolbar.

CUSTOMIZE DISPLAY OF TOOLBAR IN THE INTERFACE

1. Open Toolbar

Method 1: Right click on any toolbar. Tick ​​to select which toolbars you want to display in Word.
Method 2: (1) View → Toolbar (2) → tick toolbars you want to display.
If you want to select multiple toolbars at once, select Customize ... in the menu. Select Toolbar, in the window that appears and tick the desired toolbar.
After finishing, click Close to close the window.

2. Close Toolbar

Similar to opening toolbar, just uncheck unwanted toolbars.

3. Move Toolbar

Drag the mouse to the top left corner of the toolbar until the mouse changes to a shape of cross, hold and move the toolbar to the desired location.

4. Add Commands To Toolbar

Right click on any toolbar → Customize ...

In the window that appears, select Command, click the command groups in Categories box, hold the left mouse and drag the needed commands in the Command box to the toolbar. Click Close to close the window.
The article has introduced to you steps to perform with Toolbar in Word. Thus, you can customize the hidden toolbar in Word’s interface to serve your work and study.
0 comments

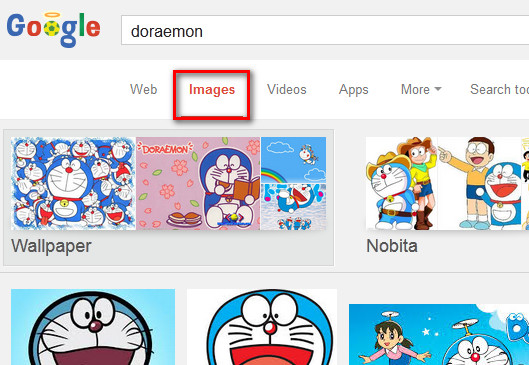
Search GIF images on Google

You are looking a GIF file on Google? Normally, to search a GIF on Google, you simply type keywords and thousands of results come up.
The results displayed on Google when searching for a GIF will take lots of time to see all the results. We will help you find the best GIF with this article.


Step 1: Go to Google at https://www.google.com.vn/ type Gif file name that you need to find, then click search.
Step 2: Select the images.
There are a lot of formats including GIF that you are looking for, but it is difficult to find the right result to download.
Step 3: Click search tools
Select GIF and let Google automatically search for GIF files.
Hopefully, this article will help you find a GIF on Google more easily. Wish you success.
 
0 comments

How to create EXE files with WinRAR

For some people, it is very difficult to create EXE files fromWinRAR. This article will duide you the way to create EXE files fromWinrar easily
You want to compress files into an EXE file with WinRAR in order to extract it on the other computers more easily. However, you do not know how to open this feature. This article will guide you the way to open as well as use this unique function of WinRAR.


Step 1: After installing  WinRAR, open the program by one of following methods
Method 1: Click on the software icon on Desktop (if you agreed to create the shortcut on Desktop in the install process).

Method 2: Click on Start (at the bottom left corner of the screen). In the Search Programs and files section, enter the Winrar keyword, then the results will be displayed right on the screen. Click on the search result for "Winrar" to open the program.
- If your computer uses Win Xp operating system, you can open the program through the Run function which is "c://programfiles/Winrar/Winrar.exe"
Method 3: More simply, choose the folder you want to compress, then right click and move the mouse to Add to Archive.
Step 2: After selecting  Add to Archive, a window will appear so that you set up the archiving mode. At this window, enter name of the compressed file on the box below Archive name or you can use the default file name.
Next, tick on the square beside Create SFXArchive so that the compressed file has the EXE format.

After selecting Create SFX Archive, the compression file format will be changed from RAR or ZIP to EXE as in the picture.
Next, click OK to move to compress the file. After the compression process is completed, your compressed file will be as follow.
Compressing the files to an EXE file will help your compressed file become an executable file. This file will automatically extract even when your computer does not have the tool for extracting like Winrar, WinZip. Besides, this format is also easy-to-use for those who are inexperienced in compressing and extracting files with Winrar and Winzip.
Wish you success!
0 comments

6 Ways to launch Command Prompt on Windows 7

You just know how to open the Command Prompt (formerly known as MS DOS) on Windows XP and other older versions of Windows but not in Windows 7? 
On the current market, there are lots of Internet software supporting command line to manipulate on the Command Prompt window instead of manipulating on normal desktop. If you are a computer expert or a professional programmer, you have to use command line frequently.


* Option 1: Use the Search tool.
This is a popular way used by lots of people. Just click Start Menu - > type Command Prompt into Search Programs and Files - >Open Command Prompt in Programs
* Option 2: Run the program from Run.
Unlike Windows XP, Run window is installed on the Start Menu in Windows 7. Just do a search like the above method with Run keyword in Search Programs and Files (or the fastest way is to use the Windows + R).
Type”cmd”or”cmd.exe”in Run - >OK or Enter.
* Option 3: Boot from the Start Menu
Click Start Menu - >All Programs - > Accessories - >Command Prompt
* Option 4: Create the Command Prompt shortcut on your desktop.
Previously, betdownload.com showed you how to create a Facebook icon on the Desktop, you can also do the same when creating the Command Prompt icon.
Right-click on any location on the Desktop - > New - >Shortcut
Create Shortcut window opens, choose the path to cmd.exe file by clicking Browser. This executable file is located in the folder C:\Windows\System32->OK
Click Next to continue
In the Type a name for this shortcut: Type a name for the shortcut you want to use - >Finish to close the setting.
Done! Now every time you start your computer, to log into the Command Prompt window, just click on this icon.
* Method 5: Set the Command Prompt shortcut on the Taskbar
If you do not want to create shortcut icons on the screen as method 4, you can to pin this shortcut under taskbar, hold the Command Prompt icon and drop into the Taskbar.
* Method 6: Boot from the Windows Explorer
Right-click the Start Menu - >Open Windows Explorer.
Access to the path containing cmd.exe(C:\Windows\System32). Enable execute file cmd.exe to open Command Prompt.
Conclusion: As you can see, opening  Command Prompt is not merely conducted in a unique way, on Win 7 you can open this window by 6 different ways. You just select the easiest way to open Command Prompt, or if you know how other additional way, please share with we!
 
0 comments

Turn off shadows under window in Windows 7

Shadows under window in Win 7 often bothers user when they want to take screenshot. Because that shadow appears around the picture user want to take screenshot. Is there any way to remove this shadow?


When using FastStone Capture software to take screenshot, shadow often appears around the area you want to take a screenshot and make the picture look bad.


Step 1: Go to Start/Control Panel and type visual effects in Search on the top right of the screen

A window appears, select

Select ”Adjust the appearance and performance of windows” of System
Step 2: A window appears, in Visual Effects, uncheck Show shadows under windows
And here is the result.

Before changing:
After changing:
With just a few simple manipulations, the article above has guided you how to turn off shadow under window in Windows 7 to help you eliminate shadow around screenshot. Hopefully, these little tricks will be helpful you.
0 comments
 
Support : Creating Website | Johny Template | Mas Template
Copyright © 2011. Document Information - All Rights Reserved
Template Created by Creating Website Published by Mas Template
Proudly powered by Blogger